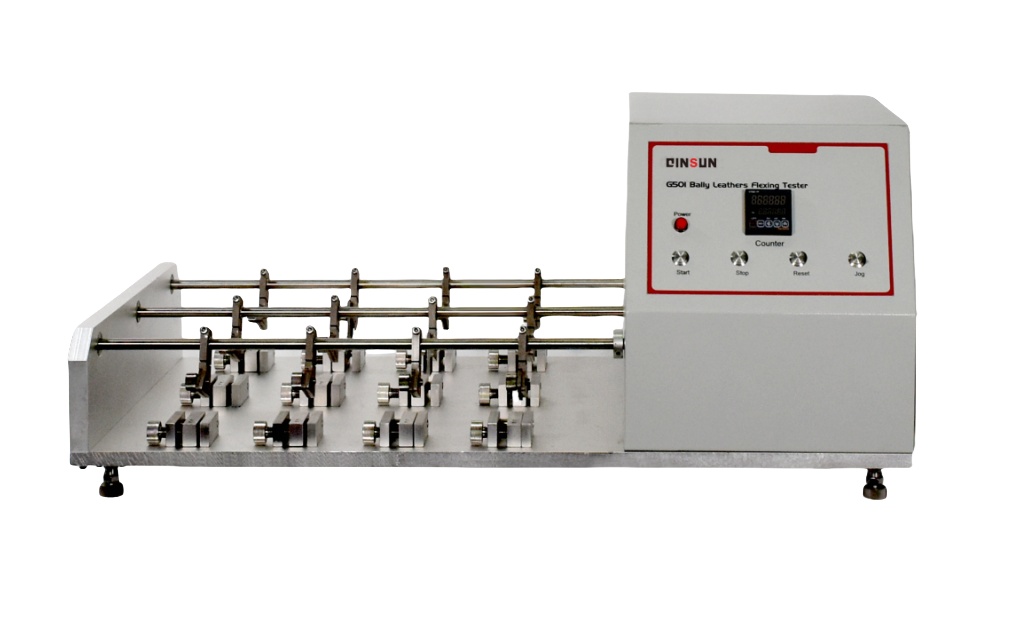
Low-temperature bending tester
This instrument is an internationally recognized instrument for evaluating the flexural resistance of various lightweight leathers and their surface finishes. It can also measure the tendency for cracking in creases caused by walking. The flex tester's bending mechanism is different from that of the upper deflection tester, but the two complement each other. It is also used to precondition samples before measuring water vapor permeability—particularly useful for testing upper materials in protective footwear.
Test Principle
The folding resistance of leather is determined by bending a specimen with one end facing inward and the other facing outward. The specimen is mounted on a specially designed test fixture at each end. One fixture is fixed while the other performs a reciprocating motion to bend the specimen until damage occurs. The number of bends is recorded, or after a certain number of bends, the degree of damage is determined.
Test Method
Specimen Preparation:
1. Specimen Collection Method and Specimen Size:
Each specimen is partially collected in accordance with the QB/T2706-2005 Leather Sampling Method. Cut at least six rectangular specimens measuring 70 (±1) mm x 45 (±1) mm. Avoid sampling areas with scars.
2. Standard Specimen Conditions:
The test chamber temperature is 23±2°C and the relative humidity is 65±5%. However, if constant temperature and humidity equipment is not available, testing may be performed at room temperature (20±15°C) and humidity (65±20%). In this case, the temperature and humidity during the test must be recorded.
3. Standard Specimen Conditions:
Before testing, the specimens must be kept at a temperature of 23±1°C and a relative humidity of 65±2% for at least 48 hours. Specimen installation:
1. Open the upper and lower clamps so that the space inside the clamps is at least twice the thickness of the specimen.
2. Fold the test surface of the specimen inward so that the two long sides are together. Clamp the folded specimen (see Figure (3)) so that the folded side is close to the bottom of the upper clamp and one end is close to the elastic pin of the upper clamp.
3. Wrap the two unclamped corners of the specimen outward and downward around the clamp so that the two surfaces of the specimen are in contact. Fix the free end of the specimen in the lower clamp and stretch it vertically. The force used should not exceed the force required to just tighten the leather.
Instrument usage steps:
1. According to the leather sampling regulations of QB/T2706-2005, obtain the test specimen to be tested and install the specimen on the testing machine.
2. Turn on the power and check whether the instrument is operating normally.
3. Install the test specimen according to the test piece installation method.
4. Set the counter to the number of flexing times.
5. Press the "Start" button to start the test.
Maintenance
1. Clean dust from the radiator regularly to maintain ventilation.
2. Keep the machine clean at all times. Wipe the machine with a cotton cloth before and after each test to keep it clean. Also use cotton to wipe away any water droplets in the machine to prevent rust on the steel plates and fixtures inside the machine during extended periods of non-use.
3. Regularly spray the machine's metal surfaces with disposable anti-rust oil.
4. Regularly re-lubricate the machine's transmission components.
5. Clean the condenser and evaporator in the refrigeration unit regularly to ensure the life of the compressor.
6. Check the motor and reducer for proper operation.
7. Check all switches to ensure the counter is functioning properly.
8. Turn on the fan before starting the compressor; otherwise, the compressor will not start.
9. Avoid starting and stopping the compressor too frequently to maintain its life. If it is necessary to start the machine again, wait three minutes or more between starts.
10. Do not allow paper or other debris to get stuck in the radiator.